Dynamixel AX-12A Heat Sinks
Warning: Before proceeding further, I want to make it clear that this step is purely optional. It is not sanctioned by Robotis in any manner and surely will void the warranty of any AX-12As, if performed on them. I am including it here because we are often asked about it, so am making the procedure available for all. Perform at your own risk and we are not responsible for the outcome!
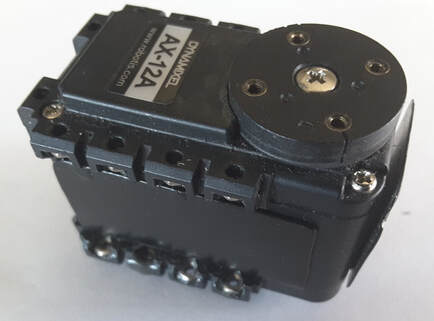
As mentioned previously, the Dynamixel AX-12As are a rugged, well performing actuator and you really can't beat them for the price. However, even the AX-12As have been known to stop functioning for us. Usually this can be traced to one (or multiple) of the following:
RTEAM robotics has developed a procedure to help save the motor drive chip. We add a heat sink to it. We've probably done this procedure to well over a hundred AX-12As with no issues.
After a long, hard fought match, you can feel the warmth on the added heat sink. This is heat that would be in the motor drive chip, if you didn't have the heat sink. Potentially saving your actuator or extending its live.
- The Mech weighs too much for the actuators.
- The legs are too long for the Mech/Actuators. This results on a long lever arm from the Mech center of gravity to the leg actuator location, resulting in a high load torque always being applied to the AX-12As.
- The center of gravity of the Mech is too high. This usually can be traced to the turret design. As the Mech walks, it tends to tilt a bit during the gait. If the center of gravity is too high, a large torque pulse gets applied to the actuators over and over again.
- The Mechs leg(s) get stuck on something. This can happen in combat, such as getting stuck on a car/prop or hitting a building edge. It can also happen when playing around with your Mech, such as trying to walk on carpet. If you are in a stuck condition with the AX-12As for too long, they can overheat and damage the actuators.
RTEAM robotics has developed a procedure to help save the motor drive chip. We add a heat sink to it. We've probably done this procedure to well over a hundred AX-12As with no issues.
After a long, hard fought match, you can feel the warmth on the added heat sink. This is heat that would be in the motor drive chip, if you didn't have the heat sink. Potentially saving your actuator or extending its live.
Step 1: Check All Your AX-12A's Before Proceeding
Remember in the previous section, AX-12A Setup, where we had you connect to your AX-12A actuator and make sure it was working? Go do that to all your AX-12As. If they are not working correctly from the factory, you can still send them back at this point to Robotis and get a refund/replacement.
Step 2: Cut Out the Heat Sinks
Next you will need to construct the heat sink plates. Thin gauge aluminum sheeting from a hardware store works well. Do make sure it is thin gauge. Later we will be slipping it in between the AX-12A motor drive chip and a capacitor which is a tight fit.
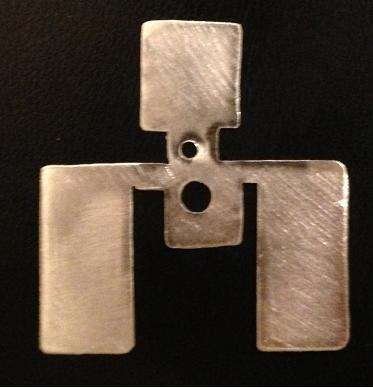
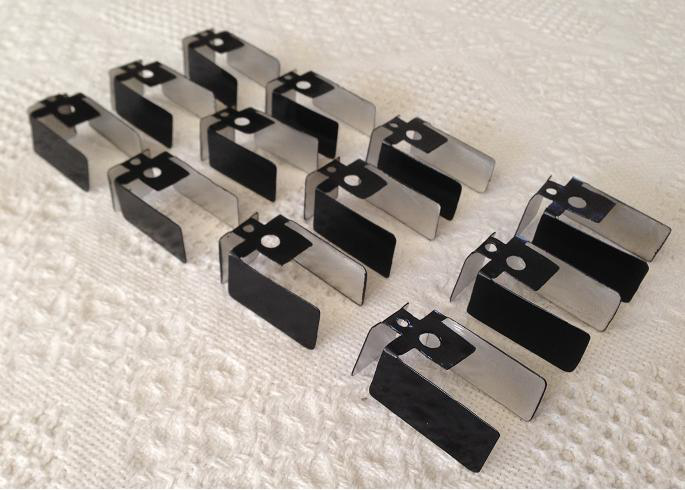
The original heats sinks I made, I cut out using a band saw and a hand drill. Don't forget/skip the holes. They are needed. As you can see, the below heat sinks are a bit crude but do the job (these were the first ones I ever made). Sand the corners and lightly sand the surfaces so paint will stick. I also cleaned the surfaces with soap and water then rubbing alcohol to remove any dirt and oils.
You can also have them water jetted from a commercial service such as Big Blue Saw. The heat sinks will look much cleaner but it costs a bit more. At a later date, I will post the files that we use to commercially water jet our heat sinks.
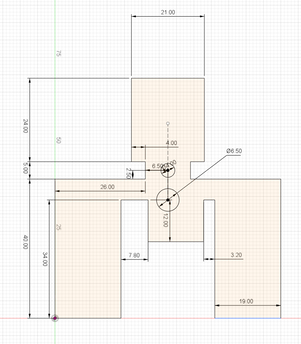
Heat Sink Dimensions in mm.
|
|
Step 3: Paint Your Heat Sinks
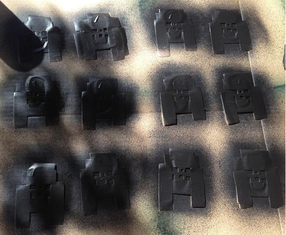
Next paint your heat sinks. You can paint a single side or you may want to paint both sides so aluminum doesn't show if things get bent. I've found that Appliance Epoxy works well as its chip resistant but it tends to only come in black or white, so you may want to choose regular spray paint.
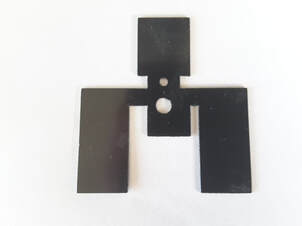
Note: Notice how clean and even the heat sink on the right appears. It was cut by a water jet.
Note: Notice how clean and even the heat sink on the right appears. It was cut by a water jet.
|

|
|
Step 4: Bend Your Heat Sinks
Next, bend your heat sinks to shape.
|
|
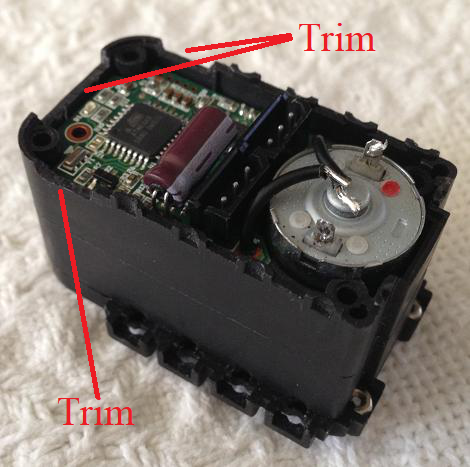
Step 5: Trim the AX-12A Case
Next open up the case on your AX-12A. Four screws can be found on the front face of the AX-12A (the side with the wheel/hub). Loosen and remove these. Turn it over and remove the back plate only. If you remove the front plate, a lot of the guts of the AX-12A can come loose and they are a pain to get back in properly.
|
(Oops. Notice how the motor leads aren't soldered in place in this picture. I think I was experimenting with replacing the motor when I took this picture.) |
Step 6: Install Heat Sink
Once your done trimming the case:
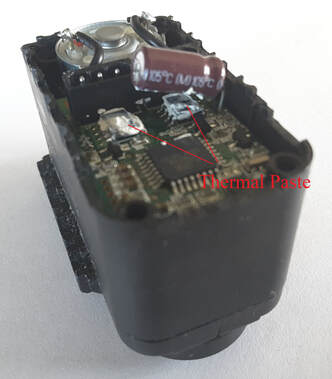
- Carefully bend up the capacitor just a bit to give you room to apply thermal paste and insert the heat sink.
- Apply thermal paste to the two locations (motor drivers) shown in the picture to the left. The thermal paste will give good contact between the motor drives and the heat sink to help dissipate heat. (Note: the thermal paste in the picture shown is a bit messy. It was an AX-12A I had already done this process too and took apart for this tutorial.)
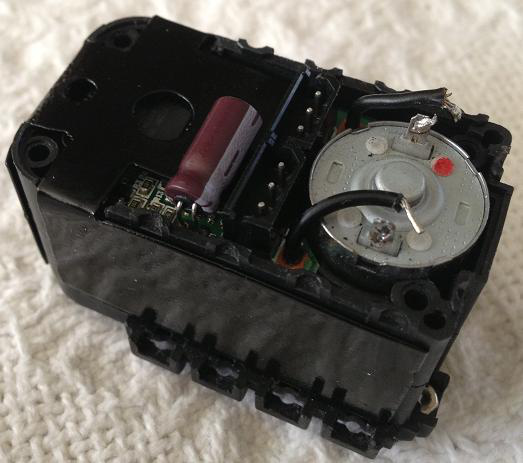
- Once the thermal paste is applied, insert the heat sink as shown on the right and carefully bend teh capacitor back into place.
|
|
Step 7: Reassemble the AX-12A
Reassemble the AX-12A.
- Snap the back plate back into place carefully. If it doesn't fit, you may have to do a bit more trimming.
- Carefully turn the AX-12A back over and install the four long screws removed earlier.
- Now test out your AX-12A and make sure its still operating using the procedure in AX-12A Setup.
Step 8: Repeat
Repeat the process for eleven more AX-12A's needed for the Mech's legs.
Special thanks to giantflaw, who pioneered this heat sinking process for RTEAM.
